Sale – 10% Off All Services – Get Your Quote Today – Expires Soon.
Crack Monitoring Made Easy: A Step-by-Step Guide Using Demec Studs and Tell-Tale Gauges.
Article By: Tom Ayre
Last Update: April 2022
In this article, we are going to discuss how you can easily monitor a crack within your home. The methods described are relatively low cost and will give you an indication if a crack is opening or closing.
Keeping tabs on a crack’s size and rate of growth can help you spot potential issues with your property. By identifying problems early, you can take swift action to rectify the situation and prevent it from worsening.
If you wanted to read more about cracks, their causes etc then please visit this article from designbuildings.co.uk
Let’s have a look at how you can monitor cracks.
Cracks in buildings can be a sign of structural problems or other issues, and it is important to monitor them closely in order to identify and address any underlying issues as soon as possible. Some common reasons why cracks may appear in buildings include:
Foundation problems: Cracks in walls or floors can be caused by problems with the building’s foundation, such as settlement or heave. These cracks may be wider at the top or bottom, and may be accompanied by other signs of foundation problems, such as doors or windows that are difficult to open or close.
Moisture damage: Cracks in walls or floors can also be caused by moisture infiltration, which can weaken the structural integrity of the building. This type of damage may be accompanied by other signs of moisture damage, such as peeling paint or wallpaper, or a musty smell.
Aging or wear and tear: Over time, buildings can experience wear and tear that can lead to cracks and other types of damage. This may be due to natural aging, or it may be caused by other factors, such as changes in temperature or humidity.
By regularly monitoring cracks in buildings, it is possible to identify and address any underlying issues before they become more serious and costly to repair. It is especially important to pay attention to cracks that are growing or spreading, as these may be a sign of a more serious problem. If you notice cracks in your building, it is a good idea to consult with a professional, such as an engineer or contractor, to determine the cause and appropriate course of action.

| Cost Per Crack | £10 to £20 |
| Additional Tools | None |
| Other Items | Adhesive / Wall Plugs / Screws |
| Typical Accuracy | 0.25 to 0.5 mm |
| Dimensions Monitored | Up, Down, Left,Right |
| Ease Of Installation | Easy |
A tell-tale crack gauge uses 2 plates laid over each other with a marked out measurement grid on one side and a precise cross-hair mark on the other.
Each plate is secured either side of the crack, over time, if the crack moves the plates will move over each other. The cross-hair which starts at 0 mm will indicate the direction and magnitude of movement.
Tell-tale gauges are very useful because they can illustrate movement and can show if the crack is getting bigger or smaller in a certain direction.
Tell-tale gauges can be purchased from a number of different websites. At THS Concepts, we use SCCS.
Advantages:
Disadvantages:
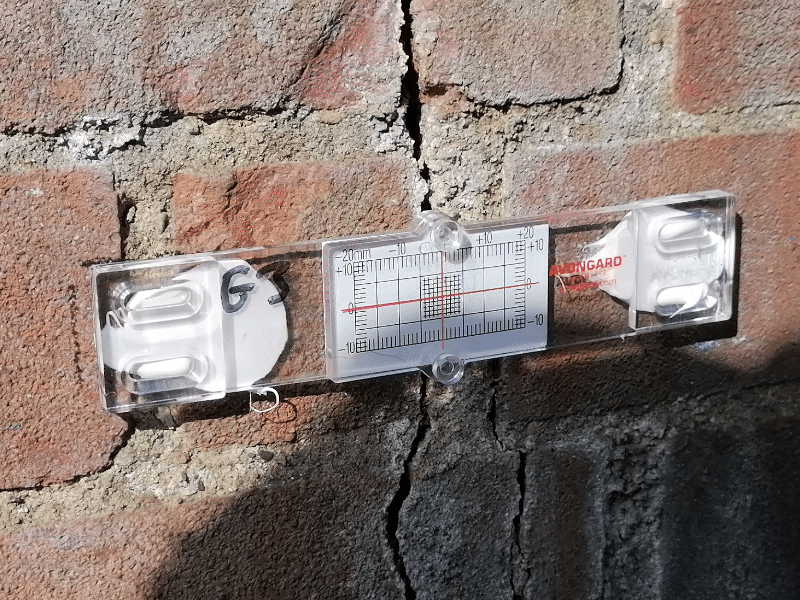
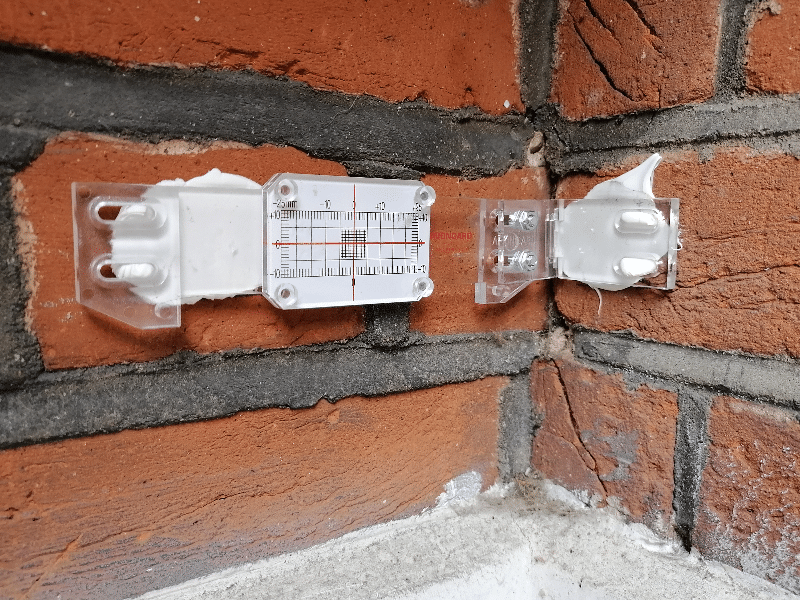
Monitoring a tell-tale gauge is very simple. Simply take a photograph, square on to the gauge and observe the movement in the X (along) and Y (up / down) axis. Record these figures down along with the date. This will then be used for further analysis into the future! Having a photograph on your phone is a useful backup in case you lose the data.

| Cost Per Crack | £0.50 |
| Additional Tools | Measurement Calipers |
| Other Items | Adhesive |
| Typical Accuracy | 0.1 mm (check calipers) |
| Dimensions Monitored | 1 direction |
| Ease Of Installation | Moderate |
Demec studs are extremely simple in their nature, they have a small dimple in the middle of the disk that a measuring caliper can measure to. When used in a pair, the measuring caliper can record the distance between the 2 disks. The measurements can then be compared over time to see if the crack is opening or closing.
Measuring calipers vastly range in price dependent on the brand and quality. We would recommend getting a digital set which show the display electronically. You can purchase a decent measuring caliper for £50, we have seen some as low as £10, but we question the quality!
Demec studs are installed either side of a crack and secured using high strength adhesive. A high quality measuring caliper is recommended to ensure you reliably and accurately record the distance between the 2 disks.
Advantages:
Disadvantages:
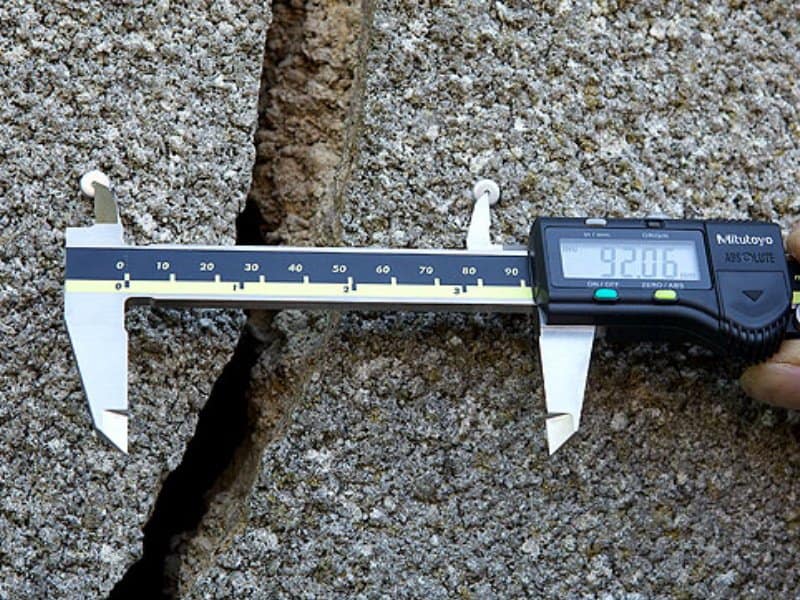
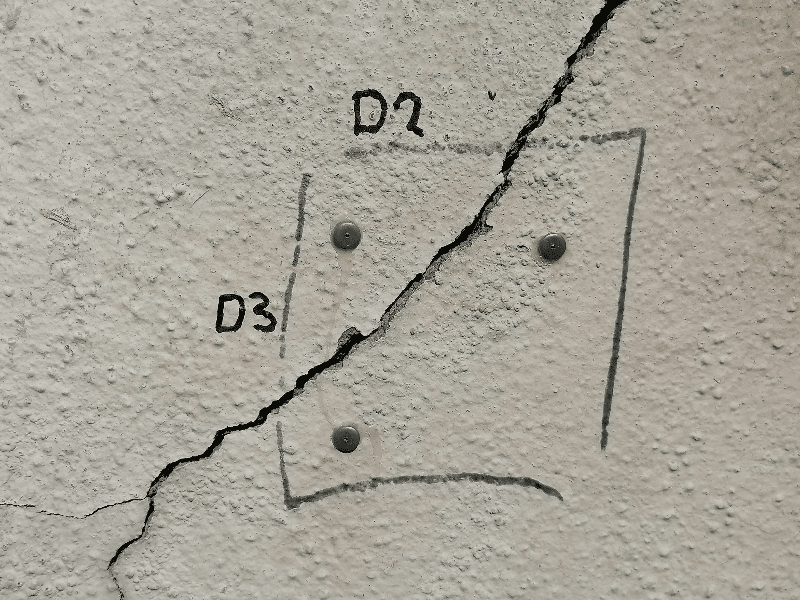
Monitoring a demec stud is quite a simple process, but does require an accurate measuring caliper. Before you begin, you must make sure your calipers are correctly zeroed. This can be easily checked by closing your calipers and checking the display shows 0. Most calipers allow you to reset to 0 if this number doesn’t show 0.
Once your calipers are set, then you can measure the dimples on each stud. We would recommend taking a few measurements, zeroing your calipers, and then average out the readings. Once you have the reading, write down the date, reference number and measurement. Store this data somewhere safe, so you can easily access it in the future!
92 Bellhouse Lane, Leigh-on-Sea, Southend-On-Sea, Essex, SS9 4PQ
76 Quill Street, Finsbury Park, London, N4 2AD
THS Concepts has a passionate team of surveyors and CAD draughtsman delivering detailed, thorough and accurate surveys and CAD drawings. We are far more than just a land and building surveying company.
Terms & Conditions | XML Sitemap | Copyright 2022 – THS Concepts LTD