Sale – 10% Off All Services – Get Your Quote Today – Expires Soon.
Welcome to our guide! We’ll show you how to open a point cloud file with Autodesk’s free Recap software and highlight some useful tools within it. Let’s get started!
Article By: Tom Ayre
Last Update: March 2024
In this post, I’ll explain how to open and use point cloud data in a free-to-use programme called Autodesk Recap. Utilising point cloud data can significantly enhance your project designs by:
Let’s get started.
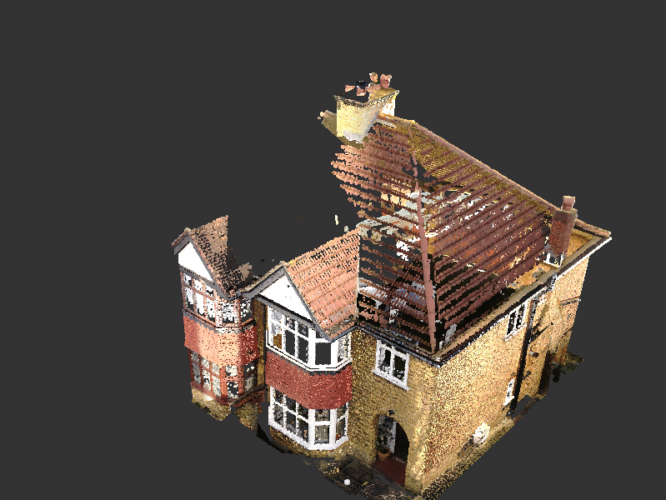
Point clouds are a collection of spatial data that represent 3D objects both large and small. Point cloud data is usually acquired by utilising 3D scanning equipment that can survey hundreds of thousands of positions per second. The point cloud survey data that is produced by the scanner is usually presented in XYZ format. This can be presented as an accurate 3D representation in computer aided design (CAD) programs.
We typically use our 3D scanner to undertake measured surveys and generate point cloud data of buildings, structures, and boats. From this data we produce a 3D point cloud CAD file that we can cut and manipulate to generate drawings such as floor plans, sections, and elevations.
3D scanning and producing a point cloud file is an excellent way of quickly acquiring large volumes of accurate data. Conventional surveying methods such as hand measurements or using a total station can never beat the acquisition speed of a 3D scanner. We use a Faro S70 scanner that can pick up data at a rate of 976,000 points/second!
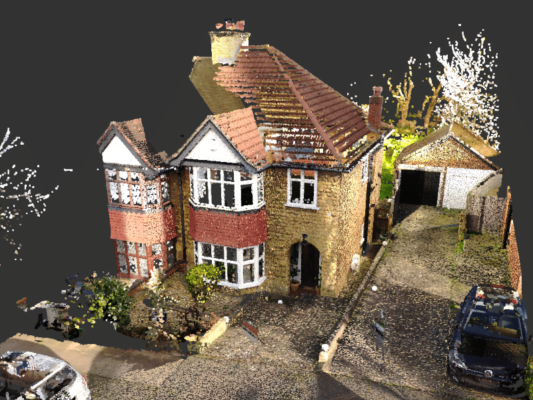
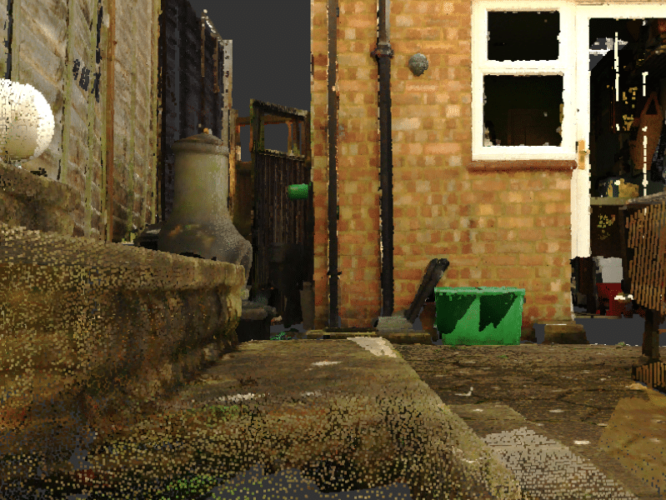
In the photos below you can see an example point cloud file and in the zoomed in image, how the point cloud is shown with lots of tiny dot (point) building up the bigger picture.
Autodesk Recap, a product of the 3D design and engineering software firm Autodesk, is a program for reality capture, which is the conversion of physical world data into digital models.
The software enables users to import, manipulate, and improve reality capture data from sources like laser scans and photogrammetry. Its tools allow for aligning multiple scans, refining point cloud data, and crafting detailed 3D models.
Autodesk Recap’s main features are:
Commonly used in fields like architecture, construction, and entertainment, Autodesk Recap uses reality capture data to optimize design processes, improve project documentation, and accurately depict real-world objects in 3D.
To download Autodesk Recap, a versatile tool for handling point cloud data, start by visiting the official Autodesk website. The provided link (https://www.autodesk.co.uk/products/recap/free-trial) leads directly to the download page for Recap Pro.
It’s important to note, though, that while the link is for Recap Pro, you are not obliged to use the Pro version. After downloading, you have the option to proceed with the basic version of Autodesk Recap, which is perfectly adequate for most users. The basic version offers a robust set of features, making it a great choice for your projects.
Autodesk Recap is a highly adaptable programme capable of processing various types of point cloud data. The list below, extracted directly from the software, showcases the formats that can be imported:
The most common point cloud file types include:
LAS (*.las): This is a standard file format for the interchange of 3D point cloud data between users and systems. It is a binary format that maintains information specific to LIDAR data.
LAZ (*.laz): This is a compressed version of the LAS file format, which is used for storing large LIDAR data sets more efficiently while maintaining all the necessary information.
E57 (*.e57): A vendor-neutral file format for storing 3D imaging data; it is typically used to store data collected from 3D laser scanners.
PTS (.pts) and PTX (.ptx): These are text-based file formats for point cloud data, often used by Leica Geosystems and other similar 3D scanning equipment.
PCD (*.pcd): Point Cloud Data file, which is the native file format for the Point Cloud Library, a popular open-source library for processing 3D point cloud data.
PLY (*.ply): The PLY format is a versatile file format for both object and point cloud data. It can store data in both text and binary forms and supports a variety of data types.
XYZ (.xyz) and TXT (.txt): These simple text file formats represent 3D points in space. The XYZ format specifically stores coordinates in a space-delimited text form, and it’s commonly used due to its simplicity.
These formats are widely supported across various software used for 3D modelling, CAD, and geographic information systems (GIS). The best format to use can depend on the specifics of the project and the capabilities of the software being used.
Launch Autodesk Recap: Start by opening the Autodesk Recap application on your computer.
Create a New Project: In the Recap interface, select the option to create a new project. This is usually found on the home screen when you first open the application.
Name Your Project: Assign a name to your new project. This helps in organizing and locating your project later.
Import Point Cloud Data:
Adjust Settings if Necessary: Depending on your project requirements, you may need to adjust certain settings related to the point cloud data, such as units, coordinate system, or point density.
Process the File: After importing, Recap may need to process the file, especially if it’s large. Wait for the processing to complete.
Explore and Edit: Once the file is loaded and processed, you can navigate through the point cloud, make measurements, add annotations, or segment the cloud as needed.
Save Your Project: Don’t forget to save your project. This ensures that all your changes and annotations are stored for future reference.
Export if Required: If you need to use the point cloud data in another application, Recap allows you to export the project in various formats.
Recap has a number of free tools that can help manipulate, measure and view your point cloud however you need to. These are some of our most used tools that we use.
There are many different types of point cloud file types. These include CPE, DXF, E57, POD and more.
One of the most common and easiest to produce file types is an Autodesk RCP file type. An RCP filetype can be opened in most Autodesk programs including AutoCad and Revit. The 3D scanning company who undertook the 3D scanning works should be able to provide you with an RCP file / folders.
An RCP can also be opened in a free to use program called “AutoDesk Recap” which can be downloaded here.
As of May 2021, Autodesk offer a pro and free version of the program. The free program is accessible to anyone and is confusingly accessed by downloading a pro trial version. You do not need to enter any billing information.
Once you have downloaded an installed Autodesk Recap you can now open .RCP file types.
An RCP point cloud is formed from an RCP file and a support file folder. Please see the image below:
The support folder needs to be in the same folder as the RCP file for it to be able to open correctly.
By double clicking on the RCP file you will be asked if you want to open it in Autodesk Recap, click yes and you should now see the point cloud.
Moving around a 3D object in a point cloud can be a little confusing. Luckily Autodesk have an excellent guide on how to easily navigate around the point cloud.
Here you can find out how to do things such as panning, zooming, orbiting, and flying through your point cloud.
Recap provides a few measurement tools that will allow you to measure distances and angles in your point cloud. You can leave the measured distance displayed in your model which can be quite helpful!
Autodesk has a great guide on using the measurement, annotations and markup.
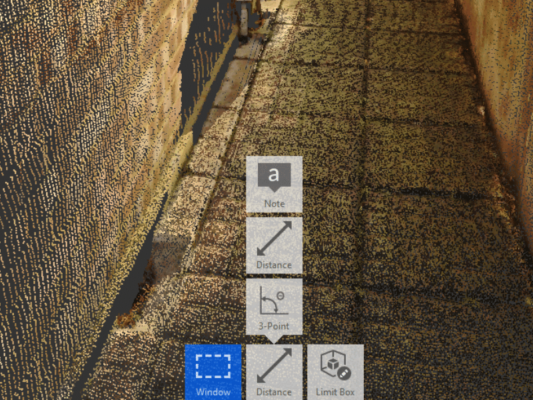
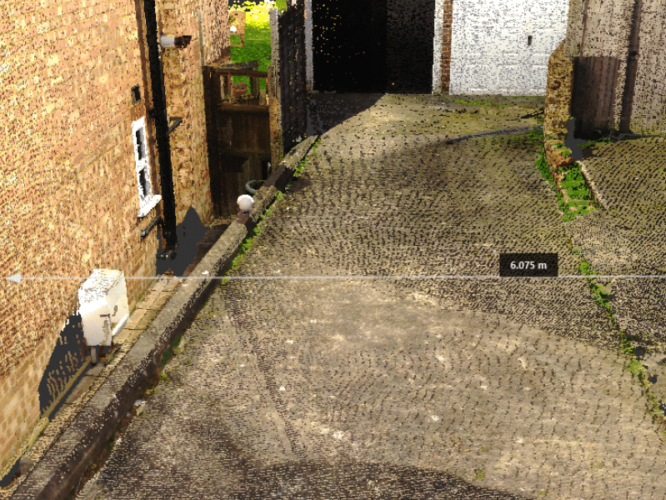
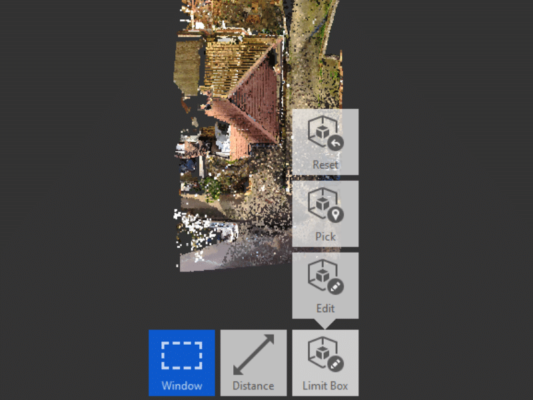
The limit box is a useful tool that can help restrict the size of your point cloud to an area that you want to see. For instance you could use the limit box to only show the ground floor, or the rear elevation.
Autodesk has written a useful guide on utilising the limit box which can be found here.
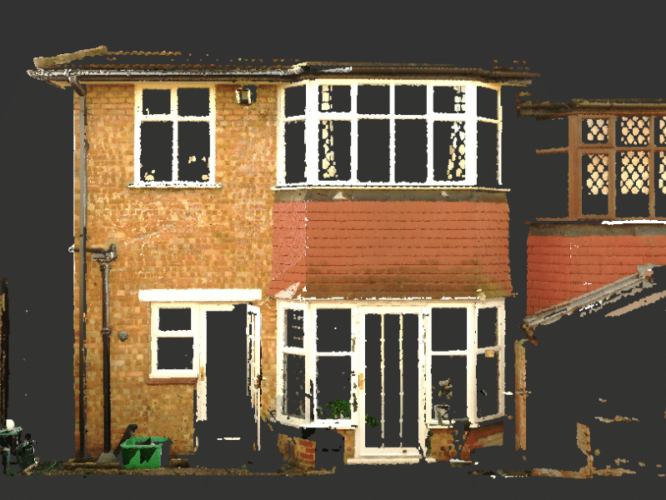
The window selection clipping tool allows you to remove any points in your point cloud that you don’t want to see. For instance the 3D scanner may have picked up neighbouring buildings or trees which you don’t want to see. With the tool you can highlight areas you do or do not want to see and clip them out so you don’t see them.
Autodesk has written a useful guide on utilising the window clipping tool, see their guide here.
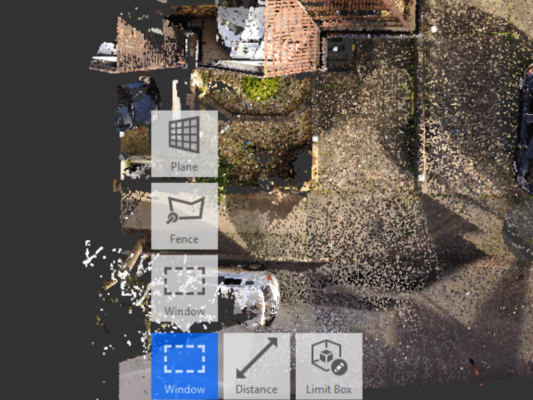
In summary, Autodesk Recap offers significant benefits when dealing with 3D scan data, helping to transform this information into digital models. With key functionalities like Point Cloud Alignment, Data Editing, Accurate Measurements, 3D Mesh Generation, and interoperability with other Autodesk software, Recap proves useful across industries such as architecture, entertainment, and construction.
The software facilitates the opening of RCP point cloud files, offers intuitive navigation, and includes helpful features like Measurement & Markup, Limit Box, and Window Selection Clipping. This means that, regardless of your level of expertise, Autodesk Recap can boost the effectiveness of your design and documentation procedures.
92 Bellhouse Lane, Leigh-on-Sea, Southend-On-Sea, Essex, SS9 4PQ
76 Quill Street, Finsbury Park, London, N4 2AD
THS Concepts has a passionate team of surveyors and CAD draughtsman delivering detailed, thorough and accurate surveys and CAD drawings. We are far more than just a land and building surveying company.
Terms & Conditions | XML Sitemap | Copyright 2022 – THS Concepts LTD