Sale – 10% Off All Services – Get Your Quote Today – Expires Soon.
Find out about the different uses and benefits of using 3D laser scanning in the construction industry.
Article By: Tom Ayre
Last Update: March 2024
3D laser scanning is a powerful tool for capturing and representing the geometry of physical objects and environments in three dimensions. In the construction industry, this technology is increasingly being used to improve accuracy, efficiency, and safety in a variety of applications. Some common uses of 3D laser scanning in construction include as-built documentation, quality control and inspection, and safety.
By providing accurate and detailed as-built documentation, improving quality control and inspection, and improving safety, 3D laser scanning can help to reduce errors and omissions, save time and money, and reduce the risk of accidents or injuries on construction sites. Overall, the use of 3D laser scanning in construction is increasing as the technology becomes more widely available and affordable.
Find out more below:
3D laser scanning is a technology that uses lasers to create a digital model of a physical space or object. It involves the use of a laser scanner, which is a device that emits a laser beam and measures the distance to the surface of the object being scanned.
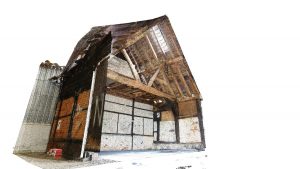
As the laser scanner moves around the object or space, it captures millions of points, known as “points cloud,” which are used to create a detailed, three-dimensional representation of the object or space.
3D laser scanning involves the use of specialized equipment to capture and process the data needed to create a digital model of a physical space or object. The main equipment required for 3D laser scanning includes:
Laser scanner: A laser scanner is a device that emits a laser beam and measures the distance to the surface of the object being scanned. It is the primary tool used to capture the data needed for a 3D laser scan.
Software: 3D laser scanning requires specialized software to process the data captured by the laser scanner and create the digital model. This software can be used to analyze, edit, and manipulate the data, as well as to create visualizations and other outputs.
Computer: A computer is typically required to run the software and process the data captured by the laser scanner.
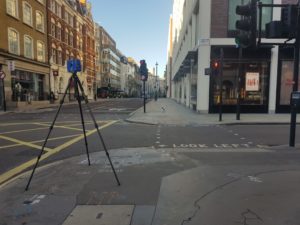
Tripod: A tripod is often used to stabilize the laser scanner and help ensure that it is level and properly positioned.
Accessories: Depending on the specific needs of the project, additional accessories may be required, such as a power supply, cables, storage media, or protective cases.
Overall, 3D laser scanning requires specialized equipment and software to capture and process the data needed to create a digital model of a physical space or object.
There are several difficulties that can arise when using traditional measured surveying methods in construction. Some of the main challenges include:
Time and cost: Measured surveying methods can be time-consuming and costly, especially for large or complex projects. They require specialized equipment and trained personnel, and the process of collecting and analyzing data can be labor-intensive.
Inaccuracy: Traditional surveying methods can be prone to errors, which can lead to inaccurate measurements and plans. These errors can occur due to a variety of factors, such as human error, equipment malfunctions, or environmental conditions.
Limited scope: Traditional surveying methods may only provide a limited view of the construction site and may not capture all of the relevant data needed for the project. For example, they may not be able to accurately measure certain features, such as underground utilities or buildings that are not visible from the surface.
Safety concerns: Measured surveying can be dangerous, especially when working in challenging environments or on large construction sites. There is a risk of falls, accidents, and other injuries, which can impact the safety of the surveyors and the overall project.
Overall, traditional measured surveying methods can be effective for certain types of construction projects, but they may also present a number of challenges and limitations that need to be taken into account.

There are several ways in which 3D laser scanning can be more effective than traditional surveying techniques:
Speed and efficiency: 3D laser scanning can capture a large amount of data quickly and accurately, making it a more efficient method for gathering detailed measurements and creating digital models. Traditional surveying methods, on the other hand, can be time-consuming and labor-intensive, especially for large or complex projects.
Accuracy: 3D laser scanning is highly accurate, with an error rate of less than 2 millimeters. This makes it ideal for capturing precise measurements and details, such as curves, angles, and irregular shapes. Traditional surveying methods, on the other hand, can be prone to errors due to human error, equipment malfunctions, or environmental conditions.
Non-contact: 3D laser scanning is a non-contact method, which means it does not require physical contact with the object or surface being scanned. This makes it ideal for scanning objects or spaces that are difficult to access or are sensitive to touch. Traditional surveying methods, on the other hand, often require physical contact with the object or surface being measured, which can be inconvenient or damaging.
Versatility: 3D laser scanning can be used to scan a wide range of objects and surfaces, including complex shapes, irregular surfaces, and hidden features. It can also be used to scan outdoor environments, such as landscapes, roads, and bridges. Traditional surveying methods may have more difficulty capturing these types of features and may be limited to certain environments.
Overall, 3D laser scanning is a more efficient, accurate, and versatile method for gathering detailed measurements and creating digital models, compared to traditional surveying techniques.
As-built documentation, also known as as-built drawings or as-constructed drawings, is a set of technical drawings that accurately reflect the actual construction of a building or other structure. These drawings are used to document the final construction of a project, including all changes and modifications made during the construction process.
As-built documentation is typically created after construction is complete, and is used to record the actual dimensions, locations, and details of the finished structure. It is an important reference for future maintenance and repairs, and can also be used for legal and regulatory purposes, such as building code compliance.
As-built documentation can be created using a variety of methods, including measured surveys, 3D laser scanning, and other digital documentation techniques. It is typically more detailed and accurate than the original construction plans, as it reflects the actual construction of the project. As-built documentation is an important tool for ensuring that a building or other structure is safe, functional, and meets all relevant standards and regulations.
Before the development of 3D laser scanning and other modern technologies, as-built documentation was typically gathered through traditional measured surveying methods. These methods involve the use of specialized equipment, such as total stations, theodolites, and levels, to collect and analyze data about the physical features of a building or other structure.
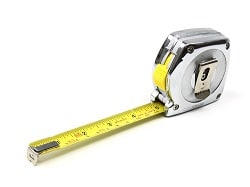
Traditionally, as-built documentation was created by physically measuring and recording the dimensions, locations, and other details of a structure, using tools such as tapes, rulers, and other measuring instruments. This process could be time-consuming and prone to errors, and it often required multiple visits to the site to collect all of the necessary data.

Quality control (QC) and inspection are important processes in construction that are used to ensure that the work being performed meets the specified quality standards and requirements. QC refers to the overall process of monitoring and verifying the quality of the work throughout the construction process, while inspection refers to the specific activities and evaluations that are carried out to ensure quality.
QC and inspection processes can involve a variety of activities, such as reviewing plans and drawings, conducting site visits and inspections, testing materials and systems, and verifying that work is being completed in accordance with the specified standards. These processes can be carried out by a variety of personnel, including project managers, engineers, quality control technicians, and independent inspection firms.
QC and inspection are important because they help to ensure that the final product meets the specified quality standards and requirements, and that it is safe, functional, and durable. They can also help to identify and correct problems or defects early in the construction process, which can save time and money and prevent issues from becoming more serious. Overall, QC and inspection are critical to the success of any construction project, and are essential for ensuring that the final product meets the required standards and expectations.
3D laser scanning has had a significant impact on the field of quality control (QC) in construction, and has greatly changed the way QC processes are carried out. Some of the main ways in which 3D laser scanning has impacted QC include:
Accuracy: 3D laser scanning is highly accurate, with an error rate of less than 2 millimeters. This makes it an ideal tool for verifying the quality and precision of construction work, and for identifying and correcting issues or defects early in the process.
Speed and efficiency: 3D laser scanning allows for the rapid and accurate capture of large amounts of data, making it a more efficient method for gathering and analyzing QC data.
3D laser scanning has had a significant impact on safety in the construction industry, and has greatly improved the way safety is managed and monitored on construction sites. Some of the main ways in which 3D laser scanning has improved safety in construction include:
Accurate measurement: 3D laser scanning allows for the rapid and accurate capture of detailed measurements and spatial data, which can be used to identify potential safety hazards and assess the safety of a construction site.
Non-contact: 3D laser scanning is a non-contact method, which means it does not require physical contact with the object or surface being scanned. This makes it an ideal tool for safely scanning objects or spaces that are difficult to access or are hazardous to approach.
Reduced exposure to risk: 3D laser scanning can reduce the need for workers to perform tasks that expose them to risks, such as working at heights or in confined spaces. It can also be used to safely scan hazardous materials or structures, such as asbestos, lead paint, or unstable buildings.
Improved communication: 3D laser scanning can be used to create detailed, accurate models of construction sites, which can be used to communicate and coordinate work activities and identify potential safety hazards.
Overall, 3D laser scanning has greatly improved safety in the construction industry by providing accurate and detailed data that can be used to identify and assess potential hazards, reduce exposure to risk, and improve communication on construction sites.
3D laser scanning is a powerful tool for capturing and representing the geometry of physical objects and environments in three dimensions. In the construction industry, this technology can offer a range of benefits, including improved accuracy, efficiency, and safety.
One key benefit of using 3D laser scanning in construction is the ability to create highly accurate and detailed as-built documentation. This documentation is a record of the actual dimensions, features, and conditions of a building or other structure as it is constructed, and it is essential for ensuring that a project is completed to the correct specifications. By using 3D laser scanning to create this documentation, it is possible to avoid errors and omissions that can cause costly delays or mistakes.
In addition to improving as-built documentation, 3D laser scanning can also be used to improve quality control and inspection in construction. Laser scanners can quickly and accurately measure the dimensions and features of a building or other structure to ensure that it is being built to the correct specifications. This can help to identify and correct any errors or deviations before they become major problems.
Finally, 3D laser scanning can also improve safety in construction. Laser scanners can be used to quickly and accurately measure the dimensions and features of a building or other structure, even in difficult or hazardous locations. This can help to reduce the risk of accidents or injuries to workers, and can also help to identify any potential safety hazards that may need to be addressed.
Overall, the use of 3D laser scanning in construction can offer a range of benefits, including improved accuracy, efficiency, and safety. As the technology becomes more widely available and affordable, it is likely to become an increasingly important tool for construction professionals.

There are several steps you can follow to get a 3D laser scan service:
Determine your needs: Determine the purpose of the 3D laser scan, such as as-built documentation, design and analysis, or quality control. This will help you determine the type and level of detail required for the scan.
Research and compare providers: Research and compare different 3D laser scan service providers to find the one that best meets your needs. Consider factors such as the provider’s experience, equipment, and pricing.
Request quotes: Contact the providers you are interested in and request quotes for their services. Be sure to provide them with detailed information about your project, including the scope, location, and timeline.
Review and compare quotes: Review and compare the quotes you receive to determine the best provider for your project. Consider factors such as cost, quality, and reputation.
Choose a provider: Choose a 3D laser scan service provider based on your research and comparison of quotes. Be sure to carefully review the terms and conditions of their service agreement before signing.
Schedule the scan: Work with the provider to schedule the 3D laser scan at a convenient time. Be sure to provide them with any necessary access or permission to the site, and make arrangements for any necessary equipment or personnel.
Overall, getting a 3D laser scan service involves determining your needs, researching and comparing providers, requesting quotes, reviewing and comparing quotes, choosing a provider, and scheduling the scan.
THS Concepts offers 3D laser scanning and the production of as-built CAD drawings for Architects, Engineers and construction professionals. Find out more about our service below and get a quote for your project.
92 Bellhouse Lane, Leigh-on-Sea, Southend-On-Sea, Essex, SS9 4PQ
76 Quill Street, Finsbury Park, London, N4 2AD
THS Concepts has a passionate team of surveyors and CAD draughtsman delivering detailed, thorough and accurate surveys and CAD drawings. We are far more than just a land and building surveying company.
Terms & Conditions | XML Sitemap | Copyright 2022 – THS Concepts LTD