Sale – 10% Off All Services – Get Your Quote Today – Expires Soon.
We explain what exactly a point cloud is and how they are obtained.
Article By: Tom Ayre
Last Update: March 2024
This article highlights the significance of point clouds in contemporary construction and engineering. Point clouds are digital models created from countless data points that define the shape and space of objects or areas.
They play a crucial role in these fields, enabling precise measurements. In construction, the accuracy of as-built surveys is essential for project success. Employing 3D laser scanning technology for point cloud creation has become an industry standard, delivering detailed and accurate spatial data.
This data supports meticulous project planning and execution. Adopting this cutting-edge technology empowers professionals to optimise project outcomes and efficiency.
A point cloud is a set of data points in three-dimensional space that represent the shape and form of an object or environment. These data points are typically collected using 3D laser scanners or other surveying instruments, and they can be used to create detailed 3D models of objects and environments.
A point cloud consists of a large number of individual points, each of which is represented by its three-dimensional coordinates (x, y, and z). These points are typically arranged in a grid-like pattern, with each point representing the distance and position of a specific location on the object or in the environment.
Point clouds can be used for a variety of purposes, including:
3D modeling: Point clouds can be used to create detailed 3D models of objects and environments, which can be used for visualization, analysis, and design purposes.
Reverse engineering: Point clouds can be used to recreate physical objects in a digital form, which can be useful for reverse engineering, prototyping, and manufacturing.
Surveying: Point clouds can be used to create accurate maps of objects and environments, which can be used for surveying, mapping, and other geospatial applications.
Quality control: Point clouds can be used to perform quality control checks on physical objects, by comparing the 3D model created from the point cloud to the desired design specifications.
Overall, point clouds are a useful tool for collecting and analyzing data about the shape and form of objects and environments in three dimensions.
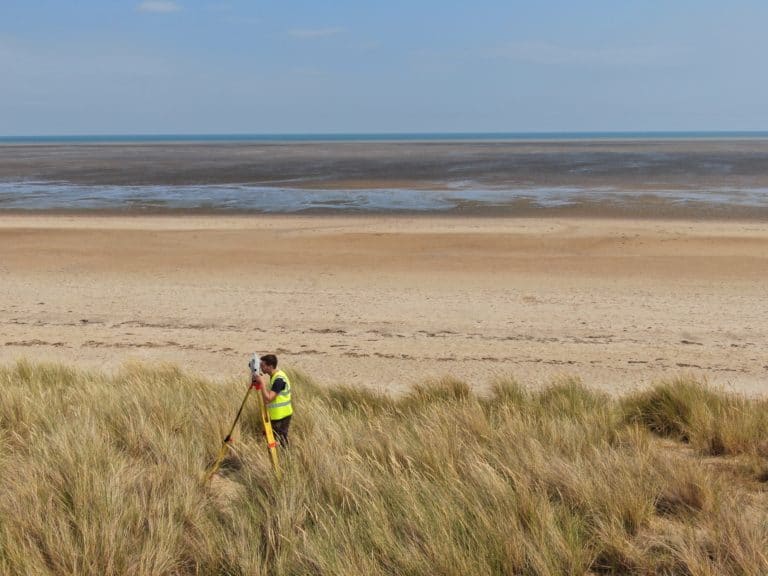
A 3D laser scanning device is a device that uses lasers to capture the geometry of a physical object or environment in three dimensions. It works by emitting a laser beam and measuring the time it takes for the beam to reflect off the surface of the object or environment. By using multiple lasers and sensors, the device can build up a detailed 3D map of the surface it is scanning.
3D laser scanning devices can be used for a wide range of applications, including surveying, industrial inspection, reverse engineering, and cultural heritage preservation. They are often used to create highly accurate 3D models of objects or environments for use in computer-aided design (CAD) or other digital applications.
There are several types of 3D laser scanning devices available on the market, including handheld scanners, stationary scanners, and mobile scanners mounted on vehicles or drones. The accuracy and range of these devices can vary widely depending on the specific model and the intended application.
When 3D scanning, it is typical to set up in a number of different locations taking numerous scans. This is to ensure all the data required is captured. Once off of the site, the 3D scan data has to be registered together using a program such as Faro SCENE. This accurately stitches all the scans together to form a registered point cloud. This process is very important, if the point cloud is not registered together well then there will be accuracy and dependency issues with the data.
A 3D laser scanner uses LIDAR (light detection and ranging) to survey objects. A typical 3D laser scanner can survey over 100,000 points a second which means a lot of data is acquired very quickly! Scanning is an excellent way of capturing a lot of detail however there are some key limitations such as scanning highly reflective objects such as glass and mirrors. These items can cause issues as the light is not properly reflected back to the scanner.
Depending on the scanner type, they can also record colour data for the point recorded which allows the point cloud to be shown in colour. This can be very useful for certain projects that require colour definition.
A 3D laser scanner will survey objects that are within its line of sight and scanning range. There is a range of different 3D scanners used for varying applications, from small sub-millimetre applications (scanning engineered parts) to large hundreds of metre scans where by you might need to scan the underside of a bridge.
Scanners pick up and produce point clouds of anything they can see, this could be:
Photogrammetry is a technique for making measurements and creating maps or 3D models of physical objects or environments using photographs. It works by taking multiple photographs of an object or environment from different angles and using the overlapping areas of the images to calculate the position and shape of the features in the photographs.
To create a map or 3D model using photogrammetry, the following steps are typically involved:
Capture photographs: The first step is to capture multiple photographs of the object or environment from different angles. These photographs should be taken using a camera with overlapping fields of view to ensure that there is sufficient overlap between the images.
Pre-processing: The photographs are then pre-processed to remove any distortion or other artifacts that may affect the accuracy of the resulting map or 3D model. This may involve correcting lens distortion, aligning the images, and removing shadows or other unwanted features.
Feature extraction: Next, the software used for photogrammetry will identify points of interest, or “features,” in the photographs. These features can include points, lines, and areas on the surface of the object or environment.
Image matching: The software will then use these features to match corresponding points in the different photographs, using algorithms such as scale-invariant feature transform (SIFT) or Speeded Up Robust Feature (SURF).
Triangulation: Once the corresponding points have been identified, the software will use them to triangulate the position of the features in 3D space, using techniques such as bundle adjustment or least-squares adjustment.
Map or model creation: Finally, the software will use the triangulated points to create a map or 3D model of the object or environment. The resulting map or model will typically be highly accurate and can be used for a variety of applications, including surveying, engineering, and visualizing complex environments.
Overall, photogrammetry is a powerful technique for creating accurate and detailed maps or 3D models of physical objects or environments using only photographs. It has a wide range of applications and is particularly useful for situations where it is not practical to use other methods, such as laser scanning or traditional surveying techniques.

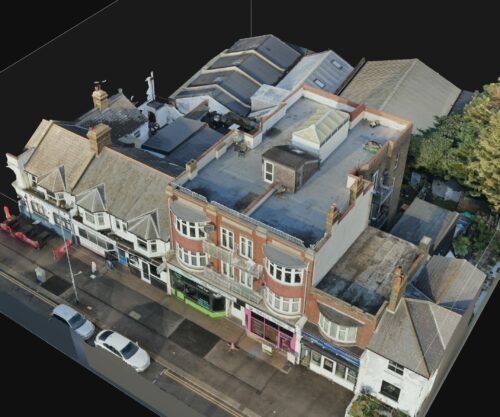
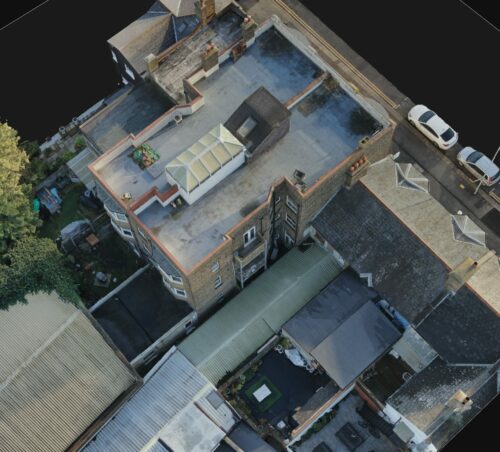
The point cloud data can be illustrated in tabular format, however it is typically presented in a visual format which shows objects within a 3D space. Modern CAD programs such as AutoCAD and Revit have many tools when it comes to viewing and manipulating point cloud data.
A point cloud can be imported into a CAD program and then manipulated to show the exact data you are after. For instance, if you 3D scan a building, you could take a slice through the point cloud at 1 metre above ground level. This can then be traced to produce a very detailed floor plan drawing. Equally, you could slice the point cloud going along the Z plane to produce a sectional cut through the building.
Point cloud scanning is the future of surveying and should be considered on most projects where important spatial data is required. The level of detail a scanner can pick up is very useful and can save a considerable amount of time on-site versus traditional surveying methods.
A regular point cloud is a set of points that are evenly spaced in a 3D coordinate system. These points are often used to represent the surface of a physical object or environment in 3D space, and can be used to create a 3D model or map of the object or environment.
Regular point clouds are typically created using techniques such as laser scanning or structured light scanning, which capture the geometry of a physical object or environment by projecting a pattern of light or lasers onto the surface and measuring the resulting distortion. The resulting point cloud will typically consist of a large number of points that are evenly spaced across the surface of the object or environment.
Regular point clouds have several advantages over other types of point clouds. For example, they are typically more accurate and easier to work with than irregular point clouds, which can have widely varying point densities. In addition, regular point clouds are often used in applications where a high level of detail is required, such as in engineering or architectural design.
Overall, regular point clouds are an important tool for capturing and representing the geometry of physical objects or environments in 3D space, and are widely used in a variety of applications.
An unordered point cloud is a set of points in 3D space that do not have a defined order or arrangement. These points are often used to represent the surface of a physical object or environment in 3D space, and can be used to create a 3D model or map of the object or environment.
Unlike regular point clouds, which are evenly spaced and have a defined pattern, unordered point clouds do not have a specific arrangement or spacing between the points. This makes them less accurate and more difficult to work with than regular point clouds, but they can still be useful in certain situations.
Unordered point clouds are typically created using techniques such as stereo vision or passive 3D sensing, which use cameras or other sensors to capture the geometry of a physical object or environment by observing the way it reflects light or other electromagnetic radiation. The resulting point cloud will typically consist of a large number of points that are scattered across the surface of the object or environment in an irregular pattern.
Unordered point clouds are often used in applications where a high level of detail is not required, or where the surface of the object or environment is not smooth or evenly spaced. They can also be useful in situations where it is not practical to use other methods, such as laser scanning or structured light scanning, to capture the geometry of an object or environment.
Overall, unordered point clouds are an important tool for capturing and representing the geometry of physical objects or environments in 3D space, and are widely used in a variety of applications.
3D modeling and visualization: Point clouds can be used to create 3D models of objects, buildings, and landscapes. These models can be used for a variety of purposes, including visualization, analysis, and simulations. Point clouds are particularly useful for creating accurate and realistic 3D models because they capture detailed surface information.
Surveying and mapping: Point clouds are often used in surveying and mapping applications because they can be used to create highly accurate 3D models of the earth’s surface. Point clouds can be used to create digital elevation models (DEMs), which are used for a variety of purposes, including flood modeling, landslide risk assessment, and environmental analysis.
Industrial inspection: Point clouds can be used to inspect industrial components and structures for defects and deviations from design specifications. Point clouds can be used to create detailed 3D models of components and structures, which can be compared to CAD models to identify defects.
Architecture and construction: Point clouds are often used in architecture and construction to create accurate 3D models of buildings and other structures. These models can be used for design, visualization, and construction planning. Point clouds are particularly useful for preserving the as-built condition of a structure, which can be used for maintenance and repair.
Virtual and augmented reality: Point clouds can be used to create realistic 3D models for virtual and augmented reality applications. These models can be used to create immersive experiences for a variety of purposes, including training, visualization, and entertainment. Point clouds are particularly useful for creating realistic 3D models because they capture detailed surface information.
Data management and storage: Point clouds can be very large and can require a significant amount of storage space. Additionally, point clouds can be difficult to manage and organize due to their complex structure and the large number of points they contain.
Registration and alignment: Point clouds are often captured from multiple viewpoints or at different times, which can result in misalignment or overlap between different point clouds. Registering and aligning point clouds can be a complex and time-consuming process, especially when working with large or poorly structured point clouds.
Noise and errors: Point clouds are often subject to noise and errors due to factors such as measurement errors, reflections, and occlusions. These errors can affect the accuracy and quality of the point cloud and can make it difficult to extract useful information from the data.
Overall, working with point clouds can be a challenging task due to the complexity and size of the data, as well as the various sources of error and noise that can affect the accuracy of the point cloud. However, advances in technology and techniques are making it increasingly easier to work with point clouds and extract useful information from them.
92 Bellhouse Lane, Leigh-on-Sea, Southend-On-Sea, Essex, SS9 4PQ
76 Quill Street, Finsbury Park, London, N4 2AD
THS Concepts has a passionate team of surveyors and CAD draughtsman delivering detailed, thorough and accurate surveys and CAD drawings. We are far more than just a land and building surveying company.
Terms & Conditions | XML Sitemap | Copyright 2022 – THS Concepts LTD