
Sale – 10% Off All Services – Get Your Quote Today – Expires Soon.
Read our guide on how to use a surveying dumpy level to accurately survey heights across your construction site.
Article By: Tom Ayre
Last Update: March 2024
A dumpy level is a surveying instrument that is used to measure levels or elevations at different points along a horizontal line. It consists of a telescope mounted on a tripod, with a spirit level and horizontal circle for measuring angles. If you are new to using a dumpy level, it can seem like a complex and intimidating piece of equipment.
However, with a little practice and some basic knowledge, you can learn how to use a dumpy level to accurately measure levels and slopes. In this blog post, we will provide a step-by-step guide on how to use a dumpy level, as well as some tips for maintaining the instrument and getting the most accurate results.
A dumpy level is a device that can be set to a very accurate horizontal plane, allowing precise height measurements to be taken when using a measurement staff. The key principle of a dumpy level is that it is set perfectly horizontal. This allows accurate vertical measurements to be taken.
A measurement staff is similar to a ruler, which is set upon the point that you want to measure. Most measurement staffs extend to around 5 metres, allowing a good range of heights to be measured.
Dumpy levels are used in a variety of different processes requiring precise levels. They are usually found on construction sites, engineering projects, archaeological digs and more!
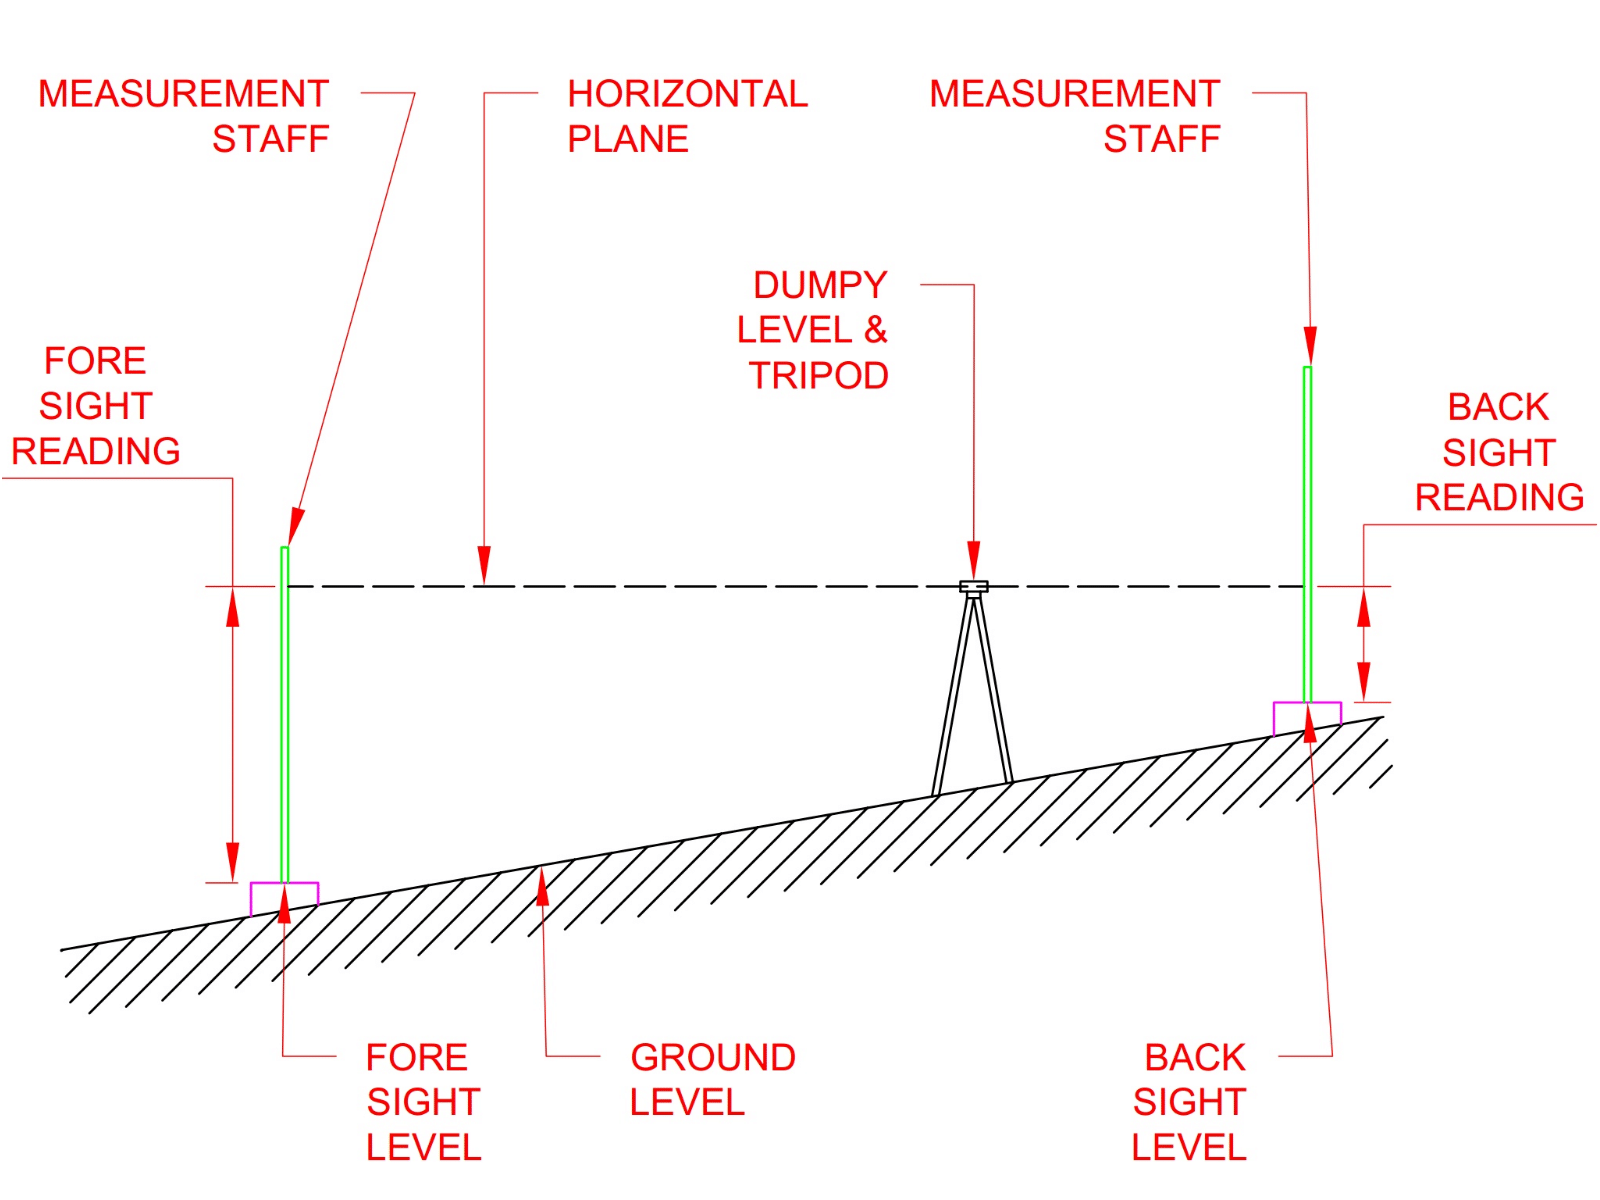
In the example diagram above, you can see how a dumpy level can be used to give an accurate height difference between the fore sight and the back sight locations. The measurement is calculated by taking the difference between the fore sight reading and the back sight reading on the measurement staff.
The equipment required for a levelling operation is fairly simple. We explain the various components below.
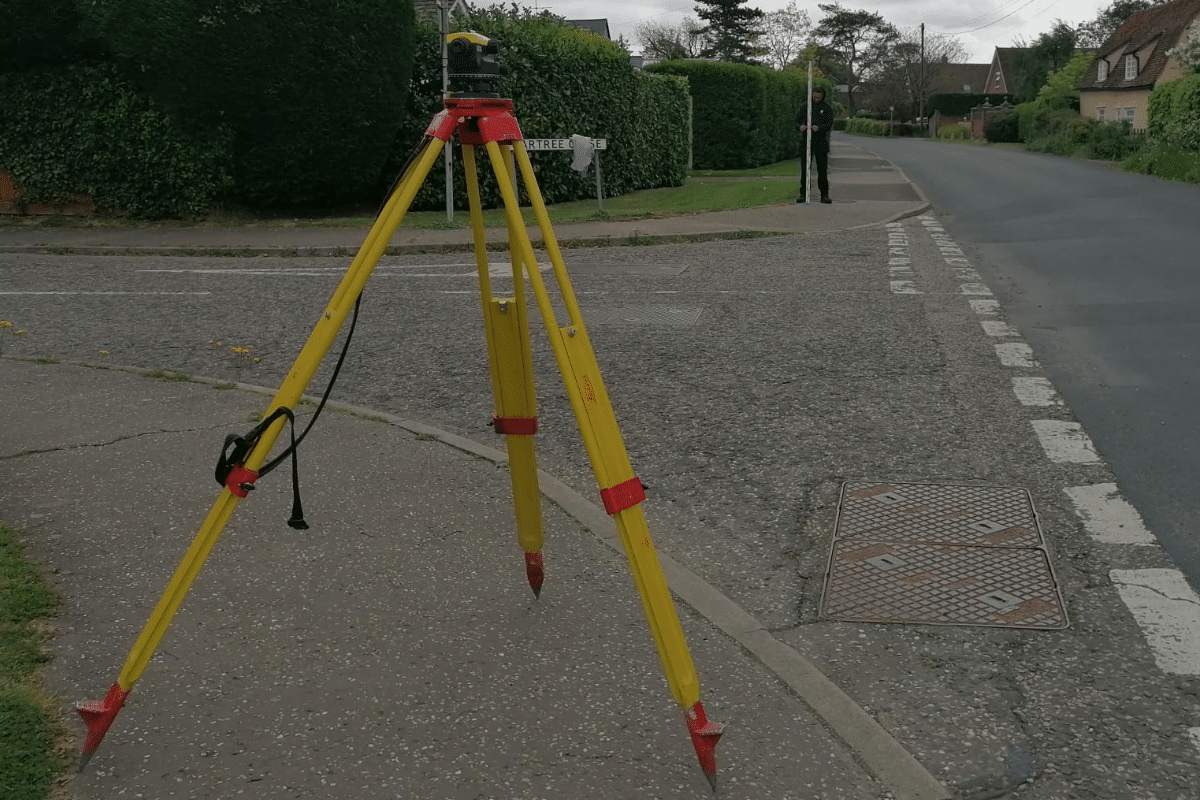
The tripod is the component that securely holds the dumpy level and gives a stable platform to work from. The tripod legs can be adjusted up and down to give a variable height for the operator.
The adjustment on the legs must be secure before operation and the legs placed on firm ground that doesn’t move or slip. The legs often have tips which can be pushed into the ground for a secure hold in soft ground.
The dumpy level is secured to the tripod using the screw that connects directly to the underside of the dumpy level.
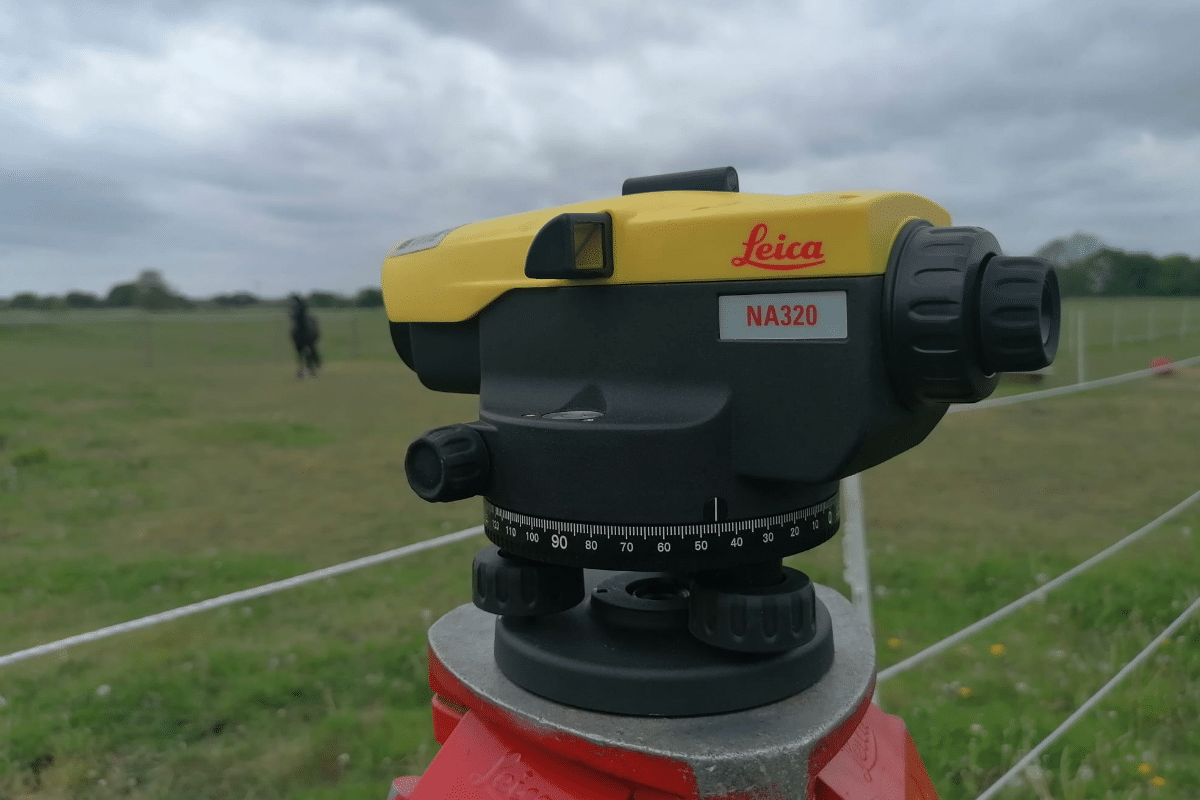
The dumpy level is the piece of equipment used to observe the measurements on the measuring staff. A dumpy level is formed of a few different and important components, these are:
Eyepiece – Used to look through and focus on the measuring staff.
Bullseye Spirt Level – Used to level the dumpy level, so it is aligned horizontally.
Focus Adjuster – Used to focus the eyepiece depending on the distance to the staff.
Compass – Used to record a bearing when taking readings.
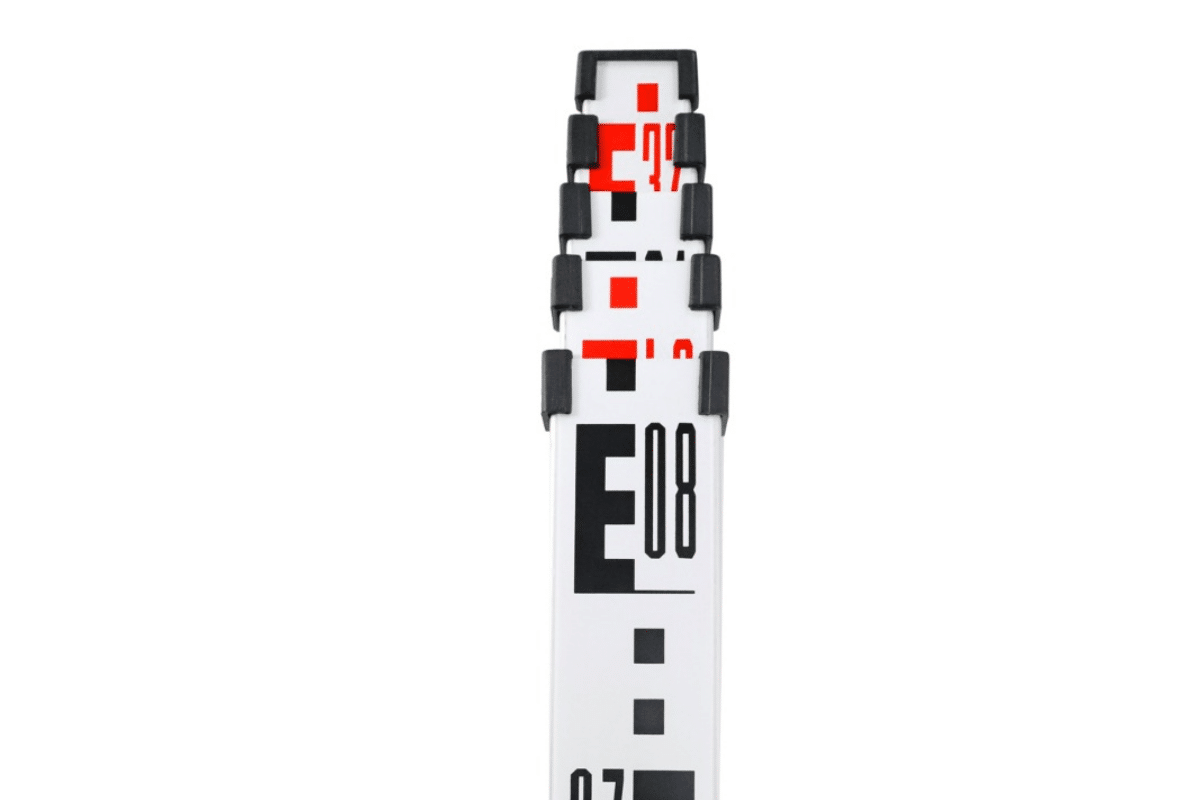
The measurement staff is simply a big ruler that is placed on top of the item you are measuring. The dumpy level then reads the height on the measurement staff. Measurement staffs usually come in 5 metre lengths, broken down into collapsable 1 metre sections.
The cross-hairs within the dumpy level show at what point to record on the measuring staff. Each notch between the numbers represents 10 mm. We explain how to read a measurement staff a bit further into this article.
When holding a measurement staff, it is crucial the operator is holding it as vertical as possible. To get the truest vertical measurement, the operator must rock the staff forward and back, with the measurement being taken at the lowest mark. More on this later.
Using a dumpy level is a relatively simple task. However, it is advised to check everything when setting up to ensure you are consistent and thorough.
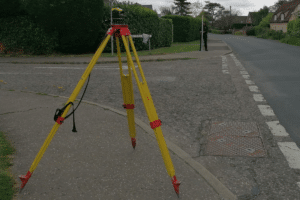
Setting up the tripod is a relatively simple. Take the tripod and un do the clips on each leg so that they can move up and down. To set the correct height, we move the tripod to the plate (where the dumpy level sits) to the bottom of our chin.
Once this is done, we then tighten the leg bolts to lock them in place. Once locked, you can then spread the legs to a reasonable angle where you are confident the dump level won’t fall over from small knocks or the wind. The photo below shows a good leg setup angle.
When placing the tripod on a soft surface such as grass, it is recommended to push each of the legs into the ground to give the legs a bit more of a rigid base.
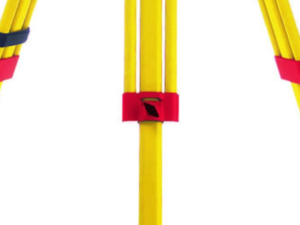
Once the tripod is set, and you are happy with the angles, it is recommended to get the top plate as level as possible. To do this, we recommend loosening 1 of the 3 leg locking bolts and sliding the leg up and down. You may have to do this on 2 of the legs to get it correct!
To set up a dumpy level:
It’s important to make sure that the tripod and dumpy level are stable and level before taking any measurements. If the instrument is not properly set up, the measurements will not be accurate.
Checking your dumpy level is crucial to ensure reliability and accurate readings. It’s always worth doing a two peg test prior to using a dumpy level. We have written a two peg test guide here.
Taking a reading on a staff needs to be undertaken carefully to ensure you are recording the correct height.
The exact height is recorded with the surveying assistant rocking the staff gently, backwards and forwards. When rocking back and forth, the readings on the staff will fluctuate up and down.
The surveyor at the dumpy level then observes this motion and records the lowest measurement that is observed during this rocking motion. The rocking motion helps to reveal the correct height.

The instrument height needs to be established prior to any actual measurements taking place. To establish the instrument height, you need to install a back sight datum.
A back sight datum is usually a timber peg firmly installed into the ground. Then on top of this peg a nail or screw is firmly installed.
Once the dumpy level has been correctly setup and levelled, the surveyors’ assistance can hold the measurement staff over the backsight and the reading can be taken. For instance, the reading on the staff may measure 1.625 metres.
For the first backsight, we prefer to give this an existing height of say +100 metres. This would make your instrument height 101.625 metres (100 + 1.625).
The reason for adding the 100 metres is so that you avoid any negative instrument heights, as these can sometimes cause people issues when adding and subtracting numbers.
With your instrument height established, you can now write these figures into your levelling book for that position. For example:
Position 1
Backsight ID = Peg #1
Backsight Height = 100 m
Backsight Reading = 1.625 m
Instrument Height = 101.625 m
If you need to reference your level survey back to an Ordnance Survey height such as OSTN15 then you will need to utilise a piece of equipment capable of giving a accurate height. This is usually a GPS RTK system. With this piece of equipment, the backsight position height can be established and applied to the height of the peg.
On some sites, a number of levels or a single level may have already been established. To reference your level survey back to this, you must first establish the height and location of the datum. Once found you can then use your staff to take a reading and use this point as your back sight.
Once you have established the height of your instrument, you will need to establish the height of your fore sight peg. The fore sight will be used to establish the instrument height on your next setup location (if applicable).
To establish the height of the fore sight peg, your survey assistant will need to place the staff on the peg and a reading taken. In this example, let’s say the reading is 2.253 metres.
To establish the height of the peg, you need to subtract this number from your instrument height. This would be:
Instrument Height = 101.625
Foresight height = 2.253
Peg #2 height = 101.625 – 2.253 =99.372 m
Once you have established the fore sight height, you will then need to write this into your levelling book.
Position 1
Backsight ID = Peg #1
Backsight Height = 100 m
Backsight Reading = 1.625 m
Instrument Height = 101.625 m
Foresight ID = Peg #2
Foresight Reading = 2.253 m
Foresight Height = 99.372 m
Position 1
Backsight ID = Peg #1
Backsight Height = 100 m
Backsight Reading = 1.625 m
Instrument Height = 101.625 m
Foresight ID = Peg #2
Foresight Reading = 2.253 m
Foresight Height = 99.372 m
Record = Invert Level – Drain 1
Record Reading = 1.973 m
Record Height = 101.625 – 1.973 (99.652 m)
Here are some tips for caring for a dumpy level:
Keep the level clean and dry: Wipe the level and its accessories with a soft, dry cloth to remove dirt and moisture. Avoid using harsh chemicals or abrasive materials.
Protect the level from extreme temperatures: Avoid exposing the level to extreme temperatures, as this can cause it to become inaccurate or malfunction. If you need to use the level in extreme temperatures, store it in a protective case or cover.
Store the level properly: When not in use, store the level in a dry, dust-free location. Avoid stacking heavy objects on top of the level, as this can damage it.
Check the level regularly: Periodically check the level’s accuracy to ensure it is functioning properly. You can do this by setting up the level and taking a series of readings to see if they are consistent.
Handle the level with care: Always handle the level with care to avoid damage. Avoid dropping or knocking the level, and be gentle when adjusting the spirit level or horizontal circle.
By following these tips, you can help ensure that your dumpy level remains in good working order and continues to provide accurate measurements.
A dumpy level is a device that can be set to a very accurate horizontal plane, allowing precise height measurements to be taken using a measurement staff.
92 Bellhouse Lane, Leigh-on-Sea, Southend-On-Sea, Essex, SS9 4PQ
76 Quill Street, Finsbury Park, London, N4 2AD
THS Concepts has a passionate team of surveyors and CAD draughtsman delivering detailed, thorough and accurate surveys and CAD drawings. We are far more than just a land and building surveying company.
Terms & Conditions | XML Sitemap | Copyright 2022 – THS Concepts LTD